Wednesday, February 6, 2013

Knitting with Silk

Silk is a true luxury fiber known for its fabulous luster, drape and intense colors when dyed.


A Bit of History

The cultivation of silk began in China before 1500 B.C.E. The legend, myth or story of its discovery starts with a Chinese “princess” (or Emperor’s wife) who was sipping tea in the garden. A cocoon dropped into her cup. Strands loosened from the cocoon suggesting the strands could be unwound from the cocoon and joined together to make thread. Silk production became a protected secret and silk fabric a much desired commodity. The Silk Road became the primary trade route all because of silk. This brought much wealth to China.

Bombyx Mori Moth 
Where Silk Comes From
Silk begins as a tiny moth egg that hatches into a tiny caterpillar. The caterpillar consumes mulberry leaves almost nonstop for 3-5 weeks, growing to 10,000 times its original weight. When the caterpillar decides the time is right it begins to spin a cocoon where it will transform into a moth and begin the cycle all over again.

Silk Cocoons
The cocoon can be literally unwound and reeled into thread without twisting. It is so fine it takes 7 strands together or more to make a thread. This is the finest and most expensive form of silk yarn.

Silk and wool blend yarn
Not all silk yarns are the same. Cocoons can be stretched or carded into different forms for spinning into yarn that are smooth and lustrous or thick and thin or other textured yarns.


Knitting with silk

Silk has body and yet is beautifully supple. It has minimal elasticity so it is often blended with wool to add memory to the yarn. Silk in a cotton or wool blend adds drape. Silk is warm to wear in cold weather and cool to wear in summer.
  • Pure silk yarn can be a bit slippery to knit through not as slippery as soy silk or bamboo yarns
  • Any knit structure will work in although stockinette will show off its luster and lace its drape.
  • Some silk yarns can be dense so cables should be knit sparingly in a silk yarn
  • Play with needle sizes – go up a size to increase the drape and down a size if you need more body in a garment.
 
Silk is an absolute delight to knit. We are so lucky to have so many beautiful yarns of and with silk to enjoy

Tuesday, January 22, 2013

Which Needle, When


I hope some knitters will remember these. This is a Boye Needle Set – one of the first interchangeable knitting needle sets. I thought they were wonderful. I could change the cable for almost any length I needed. No more running to the yarn shop at the last minute for a new needle. These needles could also be used as straights (AKA single points) by attaching a needle point at one end and a knob at the other.


Now we have multiple types of interchangeable needle sets to choose from. The joins are better and the cables are more flexible. There is even a lace set with sharper points. 


Not all needle sets are interchangeables either. I love this little sock needle set.
 
Of course, everything has its downside. The disadvantages to needle sets:
 
·         If you are working on more than one project that project may call for the same needle size you are using on another project. Several companies will let you buy extra needle tips for your favorite sizes – a great idea that eliminates this problem.

·         The joins on interchangeable needles are not always secure. Some loosen while knitting. Some actually break or come apart. It seems this plagues some knitters more than others – maybe due to knitting style? Almost all companies will replace a broken needle at no extra charge.

·         Until recently needle sets had sizes 4 up 15. There were no interchangeable needles for sizes less than 4.  Now a few companies have created smaller sets specifically for lace and fine knitters in sizes 0-4. Lovely!


Wood, Metal or Plastic

Some knitters do not care what the knitting needle is made of while others absolutely swear by bamboo or nickel plated or plastic. Sometimes it does matter. For beginning knitters I recommend bamboo or plastic needles. The stitches slide a bit more slowly but they do not fall off as readily as they do on metal. It also matters with slippery yarns such as bamboo, linen and some silks. A few dropped stitches might be prevented by using a wooden needle. The laminated wood needles like those from Knitter’s Pride make a nice smooth surface – not as slick as metal and not as slow as bamboo.


Dark or Light

A cautionary note on colored needles, these are usually woods but some metal needles also come in colors. It is more difficult to knit dark yarns on dark colored needles. Of course, they are perfect for lighter colored yarns. What a surprise to find that now we have to match our knitting needles to the yarns


The Point
For knitting that does not require a lot of manipulation, i.e., increases, decreases, twisted stitches; the point of the knitting needle does not matter. For lace knitting, some sock knitting, knitting with the manipulations mentioned above, a longer, more pointed tip can make all the difference in easy knitting or knitting filled with frustration. I struggled long with a pair of socks before I figured this out. I felt vindicated when the “Lace” knitting needles were produced. I cannot be the only one.
Choose your needles wisely.  Happy Knitting.


Sunday, January 6, 2013

About Knitting Needles

 
We are so lucky to have many wonderful knitting needles. Not only are today’s knitting needles excellently crafted but many of them are beautiful and some just plain cute. It can be hard to choose.


Double Point Needles were most likely the earliest type of knitting needle. These were used (and still are) for knitting socks, hats and sweaters in the round.  
 
Advantages:
·    Perfect for knitting in the round. Especially good when there are only a few stitches such as decreasing a hat when there may be only two stitches on each needle.
·         Two double point needles are nice for knitting an edging back and forth onto a lace scarf or shawl.
·         They are generally inexpensive.

Disadvantages:
·         The needles disappear one by one. (Let me know if you know how this happens.)
·         They fall out of the knitting especially the metal ones. Point protectors help.
·         Changes between needles cause loose stitches or gaps. To avoid these “ladders” pull the yarn tight when you work the second stitch at the beginning of each needle. Using a set of five needles helps. The knitting is on four and the fifth as the working needle.


Single point needles are used for knitting flat – that is back and forth. It is the knobs that are so appealing – cute little critters, simple but lovely woods and even jewels.
Advantages:
·         Easy to make and use especially for a beginner.
·         Relatively inexpensive.

Disadvantages:
·         Can cause physical problems such as tension in the shoulders, elbows and wrists.
·         Can also be annoying to someone sitting next to you.
·         Dropped stitches when the knob catches 


Circular Needles. are for knitting in the round. Before circulars, traditional knitters used very long double point needles to knit those incredible Fair Isle and Gansey sweaters. Circular needles are definitely a step up in technology for knitting needles.


Advantages:
·         Faster and more even knitting when knitting in the round
·         Can also be used for knitting flat, i.e. back and forth.
·         Ergonomic: Weight is distributed around the cable - less strain on the knitter.
·         Two socks at a time with 2 circular needles. No Second Sock Syndrome.
·         Stitches stored on the cable. Point protectors not necessary.
 
Disadvantages:
·         Cable join can catch stitches especially with fine yarns – improved now on some brands.  
·         Kinky cables twist making it difficult to move knitting along – also improved now.
·         Multiple lengths of the same needle size needed – a 16 inch for a hat, a 24 or 36 inch for a sweater, a 60 inch for a shawl – all in  size 6.
·         Keeping track: Circular needles are not always labeled – keep a needle gauge handy.
 
 
This is a bigger topic than I thought. Next blog will be more about needles and choosing the right needle for the yarn and project.

Sunday, December 23, 2012

Once Upon a Time in the Knitting World


Once upon a time when yarn was plain and simple, there was a dearth of local knit shops and magazines about knitting were few. Knitters did not knit in public. They were solitary and suffered from the lack of inspiration and community.

The bright stars of this era were Elizabeth Zimmerman and Barbara Walker and one magazine from France – Mon Tricot.
 
 
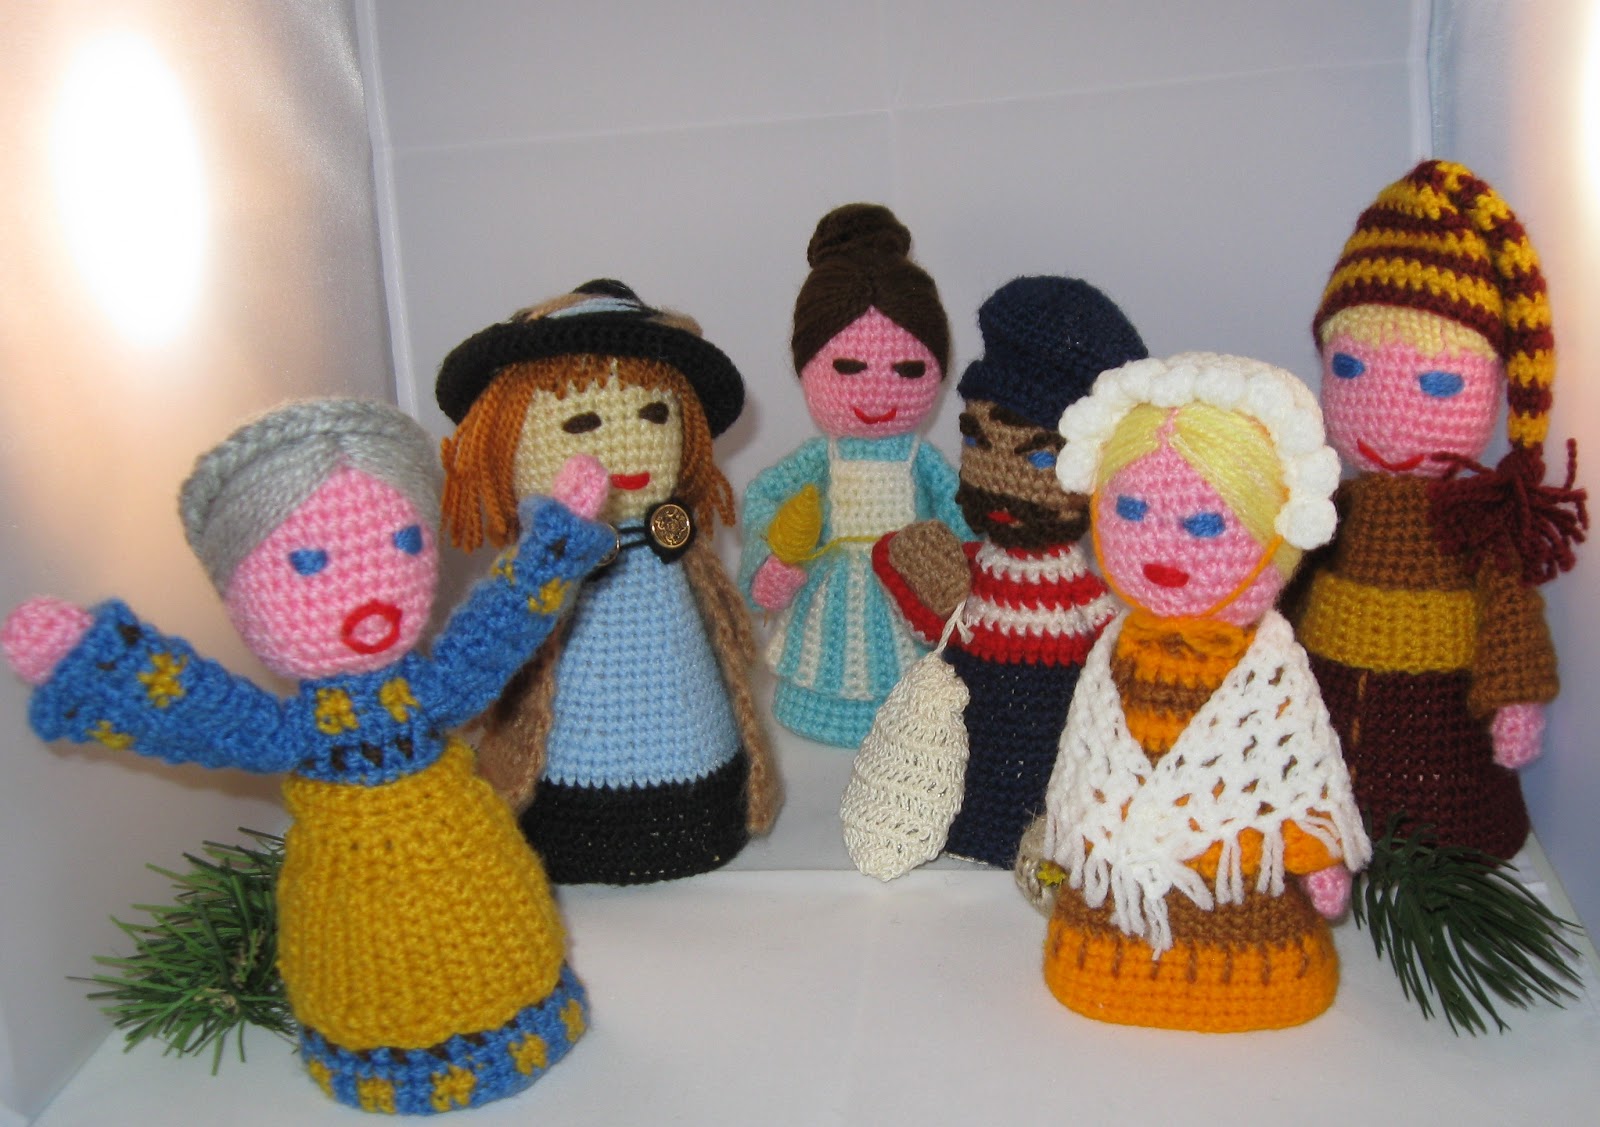
I am a fan of all three. Sadly Mon Tricot stopped printing in the early 1980s but I learned so many things from these three. They were my knitting lifeline and teachers. Among the many wonderful patterns  I learned how much fun it is to make little dolls and toys.
  
 
Yes, these are all crocheted.
I loved making them...


...following the patterns at first then I started changing little things – slightly different colors, hairstyles then creating my own little person...


.... like this little spinner. Note she is knitted. She was inspired by an entire tableau of a miniature Arizona ranch made by the Spinning Study Group of the Tucson Handweavers and Spinners. She was my contribution. Some say she is my avatar.


Knitting or crocheting little things like these dolls, the cat and dove on the ramada above, even the knit adobe houses on the side of the ramada can be addicting and incredibly fun. Luckily now there are lots of pattern books for toys of all sizes. Here are a few tips for making them:
 
Ø  Use a smaller knitting needle or hook then normally used for that the weight of yarn.  A firm fabric is needed in items that will be stuffed.

Ø  Polyester stuffing is usually the best as it does not matt. Use enough stuffing to give shape to the toy and not so much as to make it too firm.

Ø  Have lots of small amounts of yarn available. It only takes bits to sew in the mouth or eyes. It only takes small amounts to make tiny clothes, little bodies and decorations.

Ø  Beads and tiny buttons can be all kinds of things - jewelry, flowers, eyes if you like. Imagination is a good thing.

Ø  Metallic threads and yarns add sparkle and bling.

Ø  Have patience with the faces. Start with the eyes – they are usually slightly above the middle of the face. Often the eyes are all that is needed for a figure to come to life.

Ø  Various needles for sewing are needed – a sewing needle and thread and a large and small tapestry needle at least.

Ø  Start with a written pattern. There are some really wonderful patterns and pattern books now. Many of them give directions on how to do the faces and hair. It is a good starting place – and then you can create your own!
 
Have fun!


Sunday, December 9, 2012

Yeek! Steeks!

As promised this blog is about steeks. The above book is my go-to book for all things Fair Isle.
 
Why steek? The main reason is so you can keep working in the round – just knitting, no purls and you get to watch the pattern develop as you work. . The problem comes up when you come to the armholes. If you change to working flat (i.e, back and forth knitting and purling) your gauge will change as will the look of the stitches. They really will be less even.


So steeks were invented to make a holding place for the armholes, the front of a cardigan and even the neck shaping. The steek is a bridge of stitches that will later be cut, folded back and stitches picked up to work the arms of the sweater or in the case of a cardigan or neck shaping - the bands.
 
Maybe not used traditionally but stitch markers are great to mark where the steek starts and ends. Notice the placement of these on this swatch - the chili pepper is the start. The little silver one is hard to see. It marks the end of the steek and the beginning of the Fair Isle pattern.
 
 
There are lots of ways to make the steek. I am giving you my favorite as it provides:
·        A pair of stitches that outline the cutting line – the pink thread shows where the cut will be. I don’t need this when I cut the steek as I can usually follow the center lines. Some people do baste in a contrasting thread so they are sure they are cutting in the right spot.
·         A row of stitches that mark the fold line – the green thread marks this. Again this is just to show where the line is.
·         Even stitches in the garment next to the steek. Some steeks are made by winding yarn around the needle. I like the knitted steek as the garment stitches maintain their evenness.
·         Extra stitches that will not unravel after the central stitches are cut
 
 
Steeks can be added anywhere.  In the first photo the steek was started at the very beginning as if for a cardigan. The steek above is for a sleeve.
·         One stitch was removed and held in place by a locking stitch marker.
·         Then ten stitches were cast-on for the steek. Any cast on will do even the “e” or half hitch cast-on.
·         I kept the same formula – the background  color for the stitches at the beginning and end of the steek and for the two stitches in the center where the cut will be. The ones in between can be alternated in the pattern color.


I know cutting is the hardest part but it gets easier with practice. In this photo the steek is folded back to the inside of the garment and tacked with a cross stitch according to Fair Isle tradition. The cross stitching is done in white near the center of the photo.
This sweater is cotton. I did stay stitch on either side of the cutting line with the sewing machine because it was cotton. I have not done that with any of my wool sweaters that were steeked and cut and they have not unraveled a bit. Wool likes to hold on to itself. I needed a little extra sense of security with cotton.
 
Amazing, isn’t it? Fair Isle is great fun and steeking is not scary once you have done it.